According to the evidence found to date, the first beer of humanity was brewed four millennia before Christ by the ancient Elamites, a people who lived in present-day Iran.
These Asian brewers did not have the technical, material and informational resources that you would have if you decided to make your first beer.
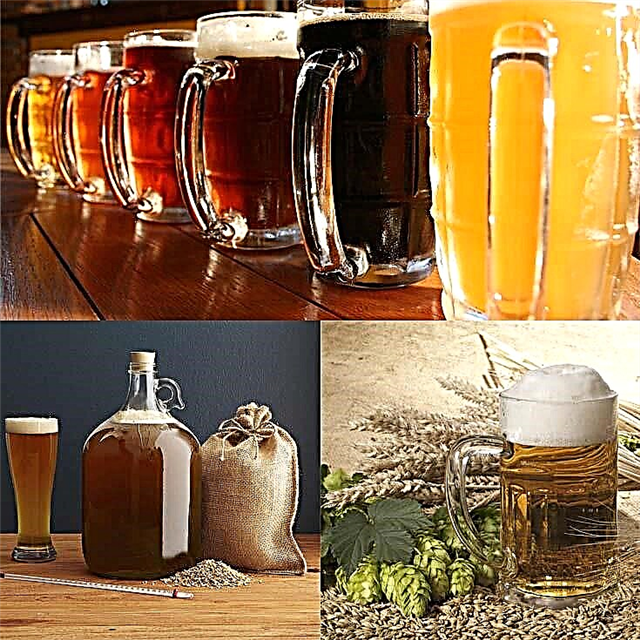
Currently more than 200 billion liters of beer are consumed in the world a year, in countless commercial brands, but there is no pleasure comparable to drinking a sparkling wine made by yourself.
It is an exciting project that, if you execute it with dedication, will allow you to become a star among your group of friends. Follow this detailed and complete step by step and you will make it happen.
The pleasure of seeing a child born

Who doesn't like a cold beer? There is nothing better to cool off on a hot day, especially if you are on the beach.
We live in difficult times and many people are turning to hobbies from which they can derive financial savings, brewing being one of them.

But the most interesting thing about making your own beer yourself is not so much the economic benefit; It might even cost you something more than buying a good batch at the supermarket.
What is really significant is the pleasure it provides to watch the work being born and then the incomparable moment of trying it out and enjoying it with a select group of friends.

You don't need a lot of fancy and expensive equipment to brew your first batch of beer.
A complete home kitchen brewing kit can be found for around $ 150.
If you are a beer fan and think in the medium term, that amount of money is much less than what you spend buying beers in a few months.
This equipment can be purchased in online stores that deliver it to your home. It can even be a project to be executed and financed among a group of friends.

To make your first batch of beer you will need the following:
A large pot:
The capacity of the container will depend on the size of the initial batch you want to make. It is recommended to start with a small batch, prepared in a pot of at least 4 liters of capacity, increasing the volume according to advances in the mastery of the process. Larger pots help reduce spillage.
Tubes and clamps:
To make the extraction siphon and bottle the beer. It is recommended to work with a food grade plastic tube, 6 feet (1.83 meters) long and 3/8 inches (0.95 centimeters) in diameter. Clamps can be purchased at a hardware store or specialty craft beer store.
An airtight fermentation bucket:
Preferably a glass carboy or jug, although a 5 gallon (19 liter) plastic bucket with a lid will do. The glass bottle has the advantage that it is easier to keep clean and disinfected, also purchasing a bottle cleaning brush.
An airlock or air trap with plug:
Of the necessary dimensions to adapt to the fermentation bucket or cylinder.
A filling bottle:
They are available at specialty craft beer stores and should be able to fit the end of the draw tube or siphon.
A thermometer:
Of the floating type, with a graduation between zero and 100 degrees Celsius or between 32 and 220 degrees Fahrenheits. Generally, the thermometer will only be necessary if you are brewing a beer under controlled temperature conditions, which is not usual for beginners.
Bottles:
You will need high-quality 12-ounce bottles of beer, enough to bottle the amount made. Easy open bottles are not recommended; those that require a bottle opener are preferable. These bottles are available in specialized stores.
A bottle capper:
It is the mechanical device that is used to hermetically place the cap on the bottles. You can buy it at the specialty store or borrow it from a friend who you know has it.
New bottle caps:
The ones you need for the number of bottles to fill and close. Since it is sold in batches, you will need 50 caps if you are going to bottle 5 gallons (19 liters) of beer.
Disinfectant solution:
Beer is very delicate and can easily become infected, so everything to be used must be disinfected before use. You can use household detergent, rinsing thoroughly to avoid contamination.
Ingredients needed

The following ingredient list has been established for the brewing of 5 gallons of basic craft beer (some styles of beer require other ingredients not listed):
- Malt: 6 pounds (2.73 kilograms) of pale malt extract without hops. It usually comes in 3-pound cans each. The malt provides the carbohydrates for the alcoholic fermentation to take place through the yeast fungi. Dry malt extract is also acceptable.
- Yeast: a packet of liquid yeast of the type Wyeast American Ale liquid Yeast # 1056, or of the type White Labs California Ale # WLP001. Liquid yeast makes it possible to make higher quality beers. The craft beer stores have these products.
- Hop: 2.25 ounces (64 grams) of hops East Kent Goldings Hops. The hop flower is the ingredient that imparts its bitter taste to beer. Hop pellets are more common and easier to store. The unused leftover hops must be kept frozen in zip-lock bags.
- Sugar: 2/3 of cup of a sugar for the beer priming. Corn sugar is used regularly, which is also available in the specialty store.
Overview of the brewing process
Beer production comprises 5 basic stages: wort production, cooling and fermentation, priming and bottling, aging; and consumption.
Below we briefly explain the meaning of each stage, which will later be developed in detail.

Preparation of the must: the pale malt extract and hops are boiled in two to three gallons of water for approximately one hour, in order to sterilize the extract and allow the hop flower to release the compounds that impart bitterness to the beer.
The hot mixture resulting from this process is called wort.

Cooling and fermentation: the wort is allowed to cool to room temperature and is then transferred to the fermenter, where the additional water needed to reach the desired 5 gallons is added in the initial batch.
With the must at room temperature, the yeast is added to start the fermentation process and the airlock is placed and closed, which allows the exit of the carbon dioxide produced by the fermentation, preventing the entry of any contaminating product into the fermenter .
At this stage, cleaning measures are crucial to prevent the must from being infected by some bacteria from the environment. Fermentation takes between one and two weeks.

Priming and bottling: Once the beer has fully fermented, it is diverted to another container for priming.
The beer is mixed with the corn sugar and the next step is to proceed to bottling. The bottles are closed with the caps using the capper, to begin aging.

Aging: bottled beer must be subjected to an aging process, between 2 and 6 weeks.
During aging, the remaining yeast ferments the added corn sugar, creating carbon dioxide, which is the compound that bubbles nicely in beer.
It can take several months to achieve the best flavor, but generally, beer is drinkable after a month of aging.

Consumption: this is of course the stage that generates the most expectation. Taking the first self-made beers out of the refrigerator and proceeding to the inaugural toast is priceless.
This whole process will have taken about 4 hours of your time, spread over several weeks, not counting the waiting period due to aging.
As you can see, craft beer making is also within the reach of people with a busy lifestyle, but who enjoy the pleasure of making something interesting from scratch.
The process in detail

You are already aware of the equipment and ingredients you need to make your first batch of craft beer and the general stages of the manufacturing process.
Now we will approach the detailed step by step, following the 5 stages indicated above.
Stage 1: Preparation of the must

For many homebrewers, this is a favorite stage because of the pleasure it provides to the senses, especially the olfactory, the aroma of the wort stirring and bubbling.
In a pot of approximately 5 gallons, washed, disinfected and well rinsed, place between 2 and 3 gallons of water and put it to heat.
Once the water has warmed up, the 6 pounds (two cans) of the malt extract are added. Since this product has a syrupy consistency, you may need a little hot water to remove the remnant that remains on the bottom and sides of the container.

When malt is added, the mixture must be constantly stirred to prevent the syrup from settling and caramelizing to the bottom of the pot.
This caramelization, even partial, can alter the color and flavor of the beer, so the movement of the mixture while it is heated is of the utmost importance.
Once a consistent mixture has been made, the next step is to bring it to a boil, but it must be done slowly and very carefully, to reduce foaming.
One method of limiting foaming is to spray it with a clean water spray. During the first 15 minutes of the boiling process a constant bubbling with minimal foaming should be achieved.
You should rule out covering the pot for faster heating, as it could be a recipe for a mess of spilled syrupy foam, running all over the stove.
Managing the heat for the first 15 minutes is crucial to achieving a steady, low-foaming boil.

Once the constant boiling with low foam is achieved, it is time to add the hops.
Hops is a plant of the cannabaceae family, from which the unfertilized flower is used to flavor beer with its characteristic bitter taste.
The appropriate amount (2.25 ounces for our 5 gallon batch of beer) of hops is weighed out and added to the boiling wort. Some brewers use hops in mesh bags to extract the leftovers after the wort brewing is complete.
The mixture should boil for a total time of between 30 and 60 minutes. During boiling, the mixture should be stirred from time to time to avoid stools.
The size of the hop pellets and the boiling time will affect the bitterness of the beer, so adding hops of uniform size is a good idea. Over time you will learn to use hops to achieve the degree of bitterness of your choice.
Stage 2: Cooling and Fermentation

After boiling, it is necessary to cool the hot wort to room temperature as quickly as possible to reduce the possibility of infection.
Some brewers add ice or cold water to the wort to speed up the cooling, taking care not to exceed the total amount of water.
Other more advanced brewers have a cooling device with a copper piping system that operates as a heat exchanger.
In any case, before transferring the must to the fermenter, cold water must be added up to a volume of 5 liters.

At this stage of the process, the wort is very vulnerable to infection, so the fermenter, the siphon tubes and clamps, the airlock and everything that may come into contact with the wort and yeast must be disinfected and rinsed.
Some brewers use bleach as a disinfectant, which requires careful rinsing with hot water to prevent the beer from tasting like chlorine.

Alcoholic fermentation is the process by which microorganisms (the single-celled fungi that make up yeast) process carbohydrates, turning them into alcohol in the form of ethanol, carbon dioxide in the form of gas, and other derivatives.

The wort must be completely cooled to room temperature before pouring it into the fermenter and adding the yeast.
Adding yeast to hot wort will kill the yeast that make it up and ruin the process.
Don't worry about hop and protein waste, called "cloudy" in brewer's jargon; most of it falls to the bottom during fermentation.

It is always better to use liquid yeast, of superior quality and more effective than dry. Liquid yeast usually comes in plastic tubes or packets.
Follow the directions for use on the yeast package, carefully adding it to the fermenter.
Once the yeast has been added, the airlock is adapted to the fermenter and closed. The fermenter should be placed in a cool and dark place, where there are no sudden changes in temperature.

The airlock should begin to bubble within 12 to 36 hours, and fermentation should continue for a minimum of one week.
If you don't see the airlock bubbling, check that the clasps are tight. Bubbles are the carbon dioxide that is generated in fermentation and it is a slow and decreasing process until it comes to an end.
Assuming there is a good seal, the bubbling should slow to one or two bubbles per minute, before proceeding to bottling.
Stage 3: Priming and bottling

The final step before bottling the beer is priming and it consists of mixing the sugar with the beer to carbonate the finished product.
Despite the fact that the fermentation has already finished, there are still possibilities of ruining the beer, so it is necessary to sterilize everything that it is going to touch, taking care not to make any splashes that add oxygen to the liquid.
Most home brewers use a large plastic bucket or carboy so that the priming sugar is easy to mix evenly. This bucket must be thoroughly sterilized, as well as the extraction siphon, the tools and of course the bottles.

With the bottles you have to be especially careful; make sure they are clean and free of residue, using a brush to remove any dirt.
Some brewers sterilize bottles by dipping them in a weak bleach solution and then rinsing well.

Other home brewers sterilize the bottles in the dishwasher, but care must be taken to thoroughly rinse off any remaining detergent so that residual soap does not damage the beer just during the bottle aging period.
Remember that for your initial batch of beer you must add 2/3 of a cup of corn sugar or another recommended for priming, adding it and mixing it gently in the priming bucket.
After priming, the beer is ready to be poured into the bottles, using the filling bottle and taking care to leave at least an inch (two and a half centimeters) of empty space in the neck of the bottle to aid fermentation final.
The bottles are then closed with the capper, verifying that a hermetic closure has been produced. All that remains is to age your first beers so you can try them at an unforgettable party with your friends.
Stage 4: Aging

For many, the hardest part is the long wait for the beer to come of age.
Although beers are drinkable after a few weeks, the average homebrew reaches its peak quality sometime between 8 and 15 weeks after bottling, a time that most amateur brewers are not willing to wait.

During the aging process, the beer is carbonated and excess yeast, tannins and proteins that create strange flavors, settle at the bottom of the bottle, which substantially improves the quality of the drink, so lengthening the wait has your benefit.
Trying to balance between the novice brewer's rush to drink the first bottle and a waiting period that ensures minimal quality, aging for at least 3-4 weeks is recommended.
Like the fermentation container, the bottles should be stored in a cool, dark place without sudden changes in temperature.

Unless you are brewing a lager under controlled temperature conditions, do not store the bottles in the refrigerator for the first two weeks after bottling.
It is convenient to let the beer carbonate for two weeks at room temperature. After the first two weeks, chilling the beer will help it improve more quickly, because leftover tannins, yeast, and protein settle more easily at cold temperatures.
Stage 5: Consumption

The big day of toasting your first beer creation has arrived. During the aging process, excess yeast, tannins, and proteins have settled to the bottom of the bottle.
Therefore, it is convenient that when you serve your first beer in the glass, you leave a small amount of liquid in the bottle. However, if a little sediment gets into the glass, don't worry, it won't hurt you.
Complete a ritual of homage to your first beer: smell the freshness of your creation, admire its color and its foamy head and finally drink your first drink without swallowing. Cheers!

We hope this guide will be of use to you in the exciting project of making your first beer at home.
During the production process, take all the notes that you consider appropriate and if the first batch does not fit exactly as you would have liked, do not be discouraged. Try again; Most of the time, the good stuff takes a little while.